红山社区比赛仿真环境

1.资料

2.仿真环境搭建

说明:因为Windows环境下仿真比较简单,并且Windows环境下能用到显卡资源,仿真可以更加流畅,可以先搭Windows环境仿真,后续代码传给我统一在linux下打包即可

  1. 解压仿真开发包.zip并将文件夹里面的仿真开发包文件夹改名成 英文名,如SimulationPackage,移动到根目录,如E:\SimulationPackage,确保后续环境不会因为路径名出错

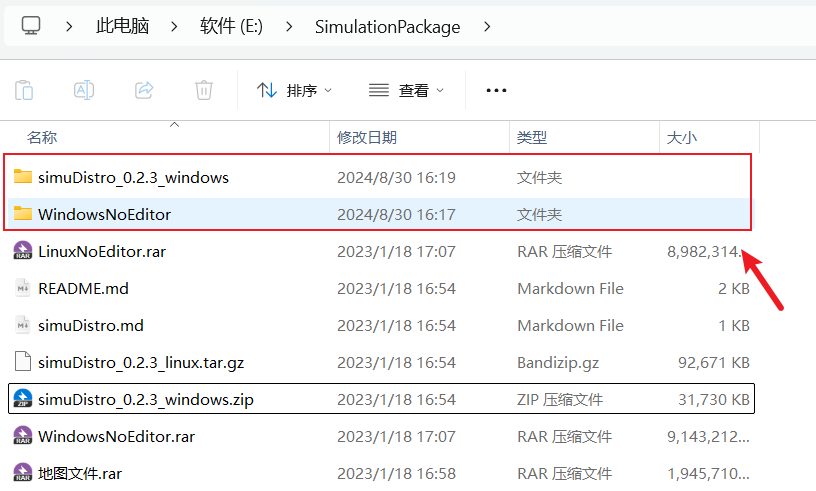
  2. 解压WindowsNoEditor.rarsimuDistro_0.2.3_windows.zip压缩包****

    image-20240830161933843

  3. 安装SDK环境

    1. 安装Anaconda :用U盘中的安装包或者官网 https://www.anaconda.com/download/success自行下载

    2. 创建python3.6虚拟环境

      1. 打开cmd终端:win+r输入cmd 或者 win+q搜索Anaconda Prompt(cmd打开如果前面没有(base),通过输入conda activate base激活)

        image-20240830163837166

      2. 通过下面的指令插件一个python3.6环境

        1
        2
        3
        4
        # sim是虚拟环境的名字,安装过程遇到选项输入y然后回车即可
        conda create -n sim python=3.6
        # 激活sim虚拟环境
        conda activate sim
      3. 通过下面的指令安装 SDK环境(不要翻墙,可能会报网络错误)

        1
        pip install https://jqtj.obs.cn-north-4.myhuaweicloud.com/sdk/windows/swarmae-1.0.1-py3-none-any.whl -i https://pypi.tuna.tsinghua.edu.cn/simple/
      4. 验证安装,终端输入python,接着输入from swarmae.SwarmAEClient import SwarmAEClient,没报错就是已经安装成功(输入quit()回车退出python环境)

        1
        2
        3
        4
        5
        (sim) C:\Users\17814>python
        Python 3.6.13 |Anaconda, Inc.| (default, Mar 16 2021, 11:37:27) [MSC v.1916 64 bit (AMD64)] on win32
        Type "help", "copyright", "credits" or "license" for more information.
        >>> from swarmae.SwarmAEClient import SwarmAEClient
        >>>

注:Anaconda安装即创建环境有问题的参考博客【超详细版Anaconda的安装及使用conda创建、运行虚拟环境以及使用镜像源】

  1. UE4仿真包配置

    1. 打开E:\SimulationPackage\WindowsNoEditor\WindowsNoEditor,右键CarlaUE4.exe->显示更多选项->创建快捷方式

    2. 修改配置文件:E:\SimulationPackage\WindowsNoEditor\WindowsNoEditor\CarlaUE4\Config\ClusterEval.ini(配置文件格式说明见第三章)

      1
      2
      3
      4
      5
      6
      7
      8
      9
      10
      11
      [Game]
      GameId="77777" #随便取
      SubjectId=5 #对应科目几,体现在仿真启动后的标题“旋翼无人机自主避障科目”
      Seconds=600 #好像没用
      AirSimComPort=4443
      AirSimCmdPort=4446

      [Team]
      TeamId="Team1"
      IMVNum=5
      QRTNum=10
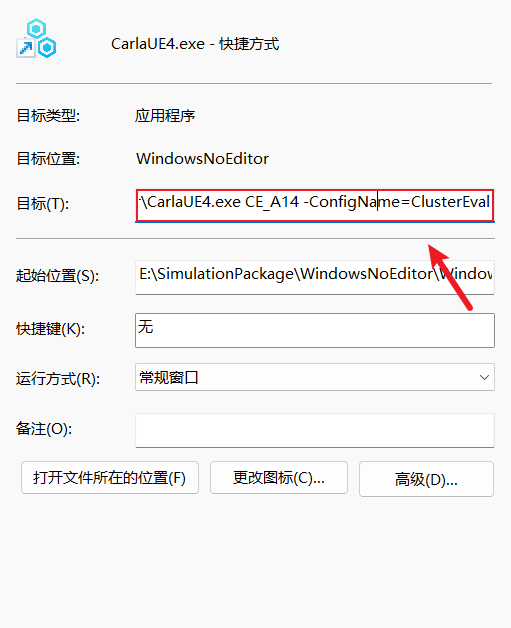
    3. 接着右键快捷方式,在目标后面加CE_L1 -ConfigName=ClusterEval(别忘了exe后面有空格),然后点击确定

      image-20240830204643839

    说明:CE_L1代表科目一的地图,CE_L2代表科目三的地图,如果是无人机的地图,则需要将其修改为CE_L4~CE_7,更详细的说明见第三章

    1. 双击快捷方式进入仿真环境,终端输入netstat -ano | findstr 2000,如果出现2000的端口则说明启动正常

      image-20240830170209964

      image-20240830171457277

  2. 启动仿真动力程序

    1. 打开E:\SimulationPackage\simuDistro_0.2.3_windows文件夹,双击start.bat即可

    2. 类型选择2. 四旋翼然后回车

      image-20240830192355312

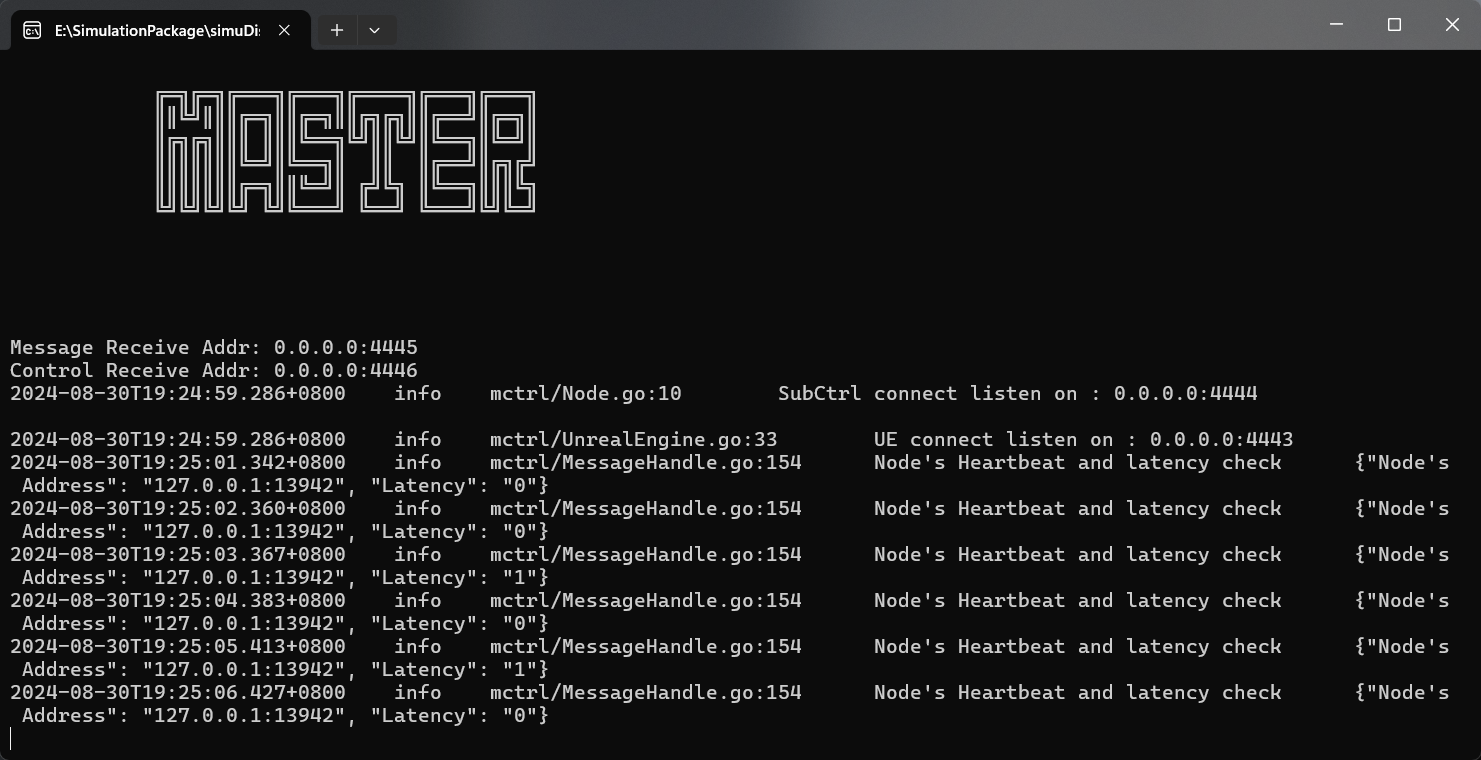
    3. 出现下面的心跳包界面说明启动成功

      image-20240830192515019

3. 配置文件说明

3.1配置文件说明

GameGameIdstring指定本场比赛ID
SubjectIdint指定本场科目编号
Secondsint指定本场比赛时长
AirSimIpip指定固定翼仿真ip地址
AirSimComPortport指定仿真引擎连接TCP端口号
AirSimCmdPortport指定仿真信息接收UDP端口号
Team1TeamIdstring指定队伍1ID
IMVNumint指定步兵机动战车数量
CMSNumint指定巡飞弹(自杀式无人机)数量
SVLNumint指定察打无人机数量
QRTNumint指定小型四旋翼无人机数量
QRBNumint指定四旋翼自杀式无人机数量
Team2--队伍2配置域,配置方法同队伍1

示例:

1
2
3
4
5
6
7
8
9
10
11
12
13
[Game]
GameId="77777" #随便取
SubjectId=5 #对应科目几,体现在仿真启动后的标题“旋翼无人机自主避障科目”
Seconds=600 #好像没用
AirSimComPort=4443
AirSimCmdPort=4446

[Team]
TeamId="Team1"
IMVNum=1
CMSNum=1
QRTNum=2
QRBNum=1

说明:载具的生成与地图有关,并不是说配置文件里面说了生成啥就是啥,经过测试,地图CE_L1~CE_L3只能生成IMVNum,即小车,对应小车的科目1到3,CE_L4~CE_L6只能生成QRTNum,即四旋翼无人机CE_L7能生成小车四旋翼无人机CE_A地图系列目前不知道是干啥用的

3.2地图说明

项目科目对应地图
空地1CE_L1
2CE_L2
3CE_L3
4CE_L4
5CE_L5
6CE_L6
7CE_L7
空中1、4CE_A14
2CE_A2
3、6CE_A36
5CE_A5
7CE_A7

说明:空中系列的地图暂时不用管

3.3科目说明

image-20240830205008117

4.完整运行流程

  1. 双击E:\SimulationPackage\WindowsNoEditor\WindowsNoEditor\CarlaUE4.exe - 快捷方式打开地图
  2. 双击E:\SimulationPackage\simuDistro_0.2.3_windows\start.bat打开动力系统
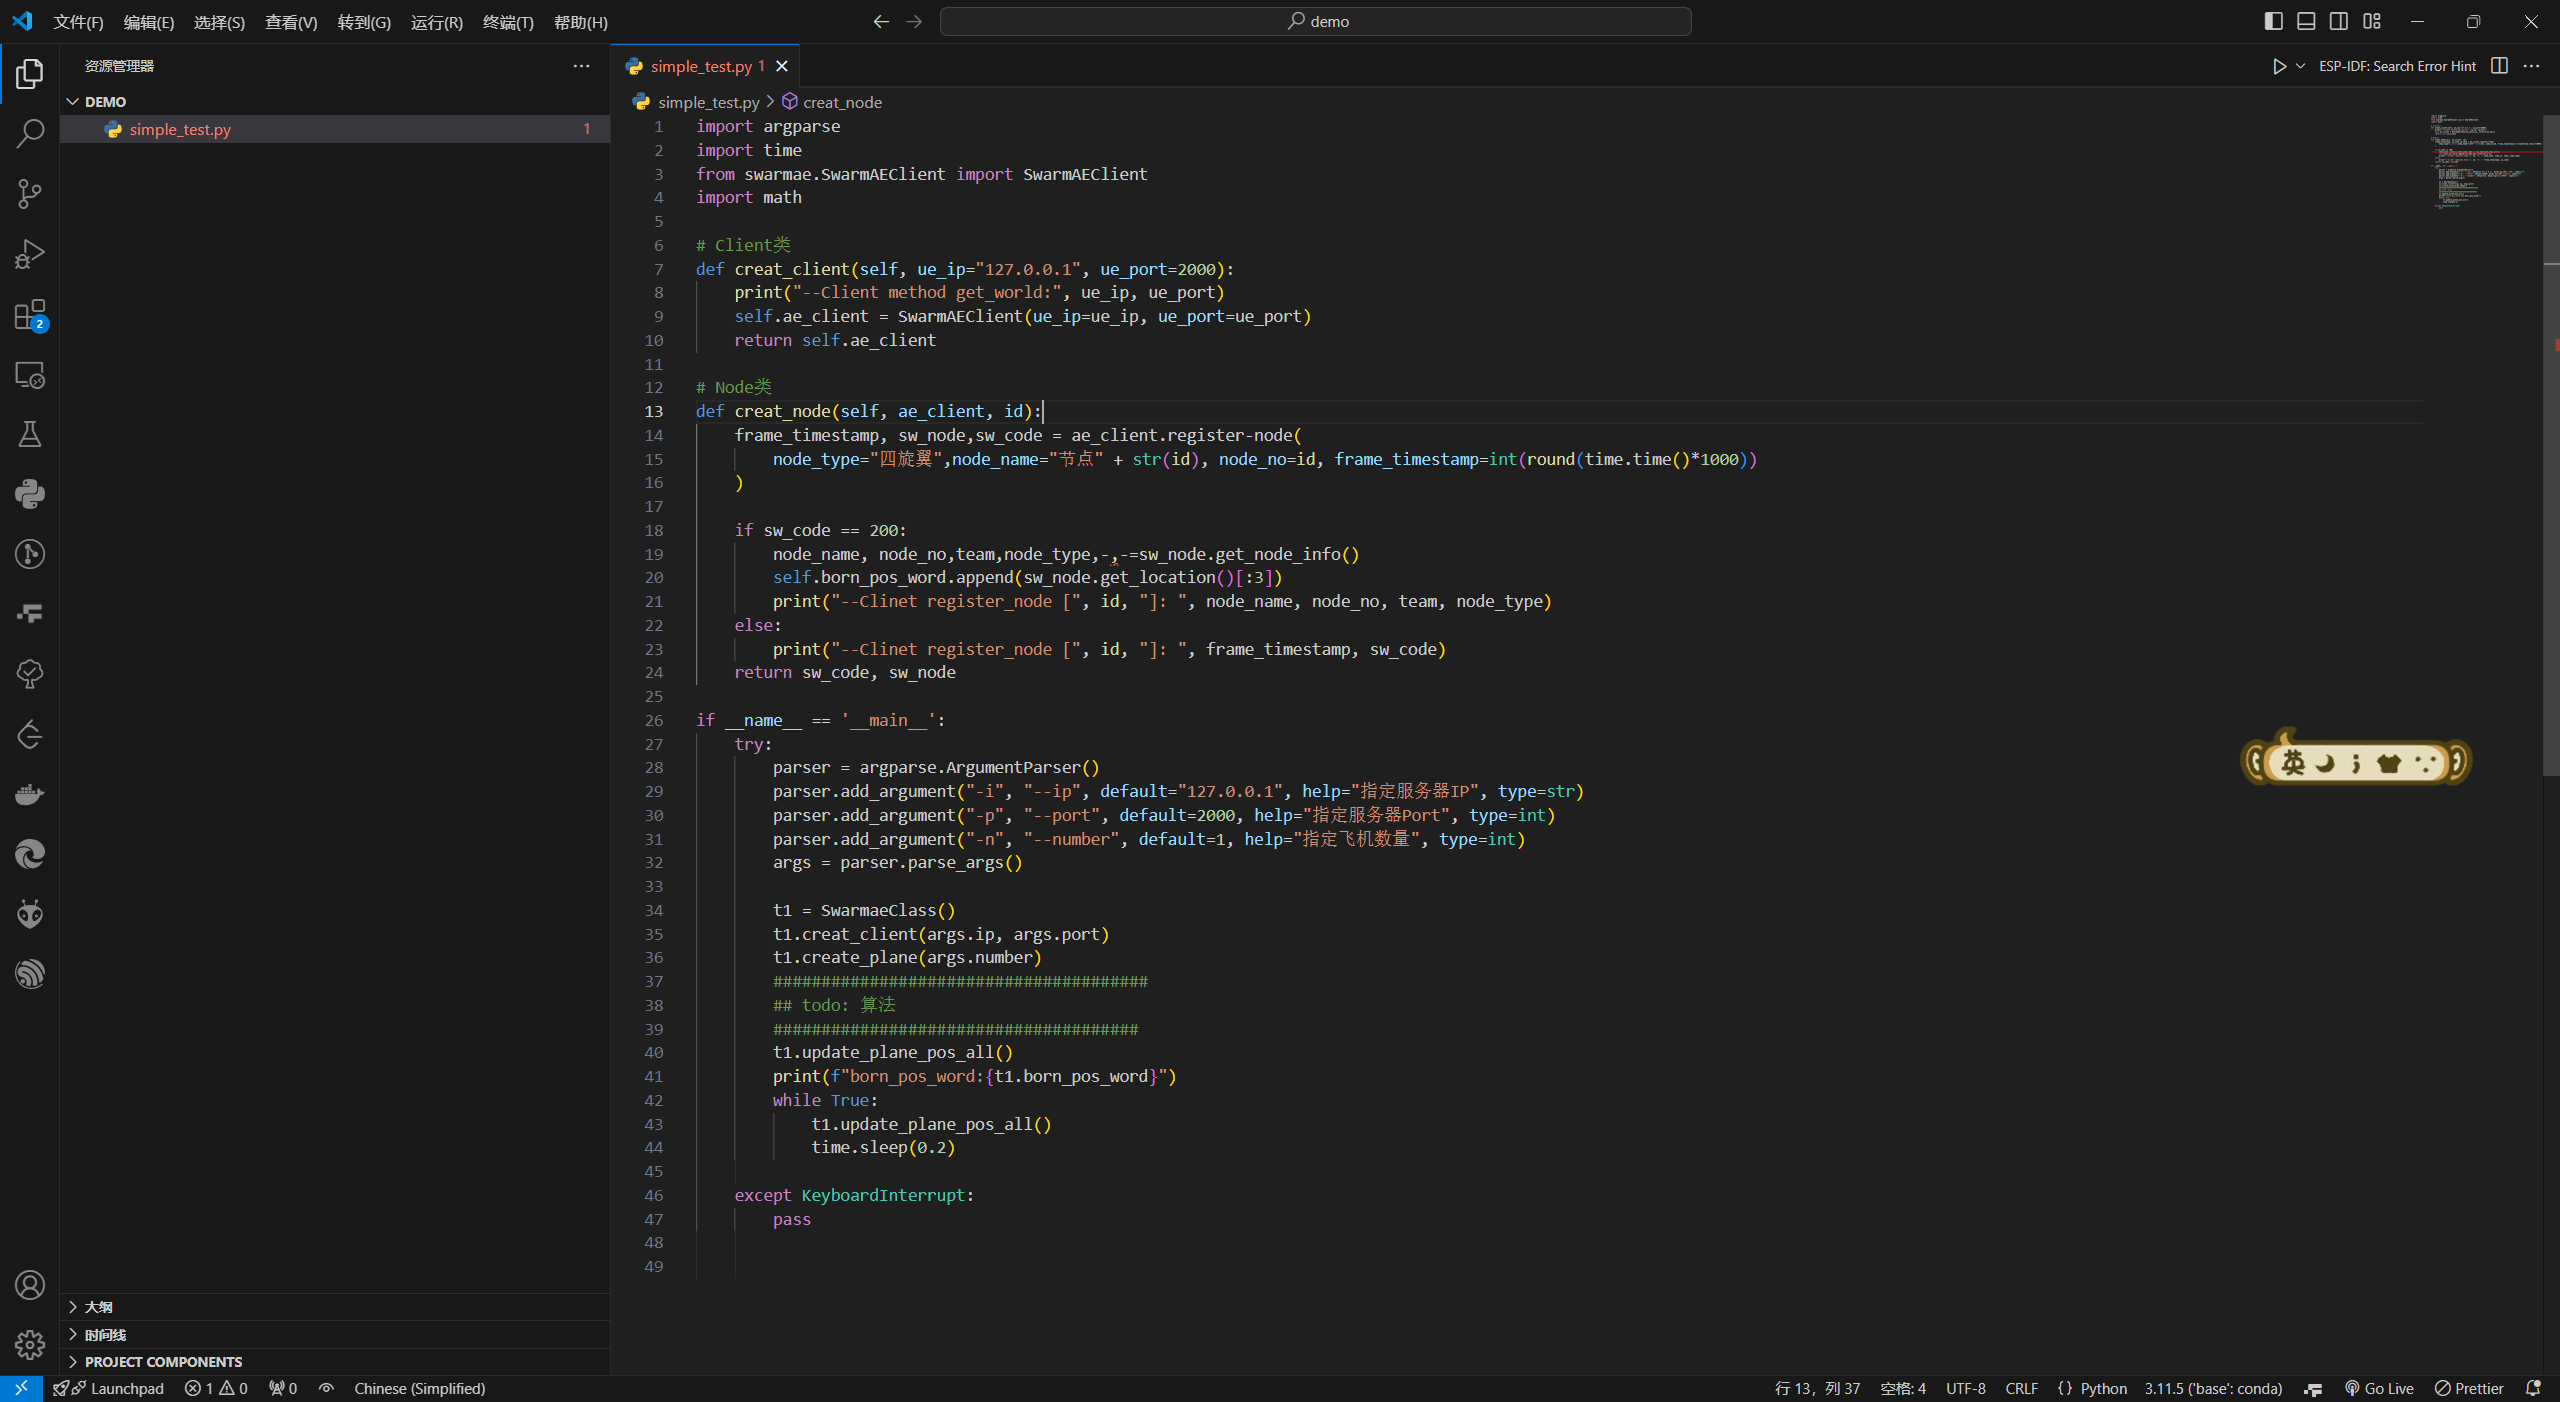
  3. 用VSCode打开demo文件夹,并且点击上面的终端->新建终端->输入conda activate sim

image-20240830194050266

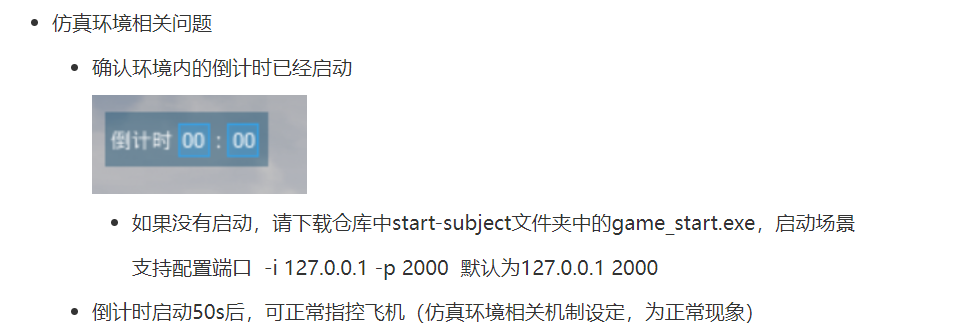
  1. 双击game-start.exe, 启动仿真内倒计时,等倒计启动了50s后才能对无人机进行控制(game-start.exe下载地址:https://www.osredm.com/JQZN/jqzn-issue/tree/master)

    image-20240902152013010

  2. 在终端输入python simple_test.py,后台显示如下,无人机向前飞行,说明仿真成功

1
2
3
4
5
6
7
8
9
10
11
(sim) E:\SimulationPackage\demo>python simple_test.py
--Connecting to UE4 simulation: 127.0.0.1 2000
WARNING: Version mismatch detected: You are trying to connect to a simulator that might be incompatible with this API
WARNING: Client API version = 1.0-34-g91df42e4-dirty
WARNING: Simulator API version = a59b6e5-dirty
vehicle.QRT.Phantom*
--Node registered successfully: 节点1, Type: 四旋翼
Node moved to new position: x=290.29998779296875, y=566.7999877929688, z=487.0
Node moved to new position: x=290.3046875, y=566.8058471679688, z=487.4312438964844
Node moved to new position: x=290.79931640625, y=567.7300415039062, z=491.5119323730469
Node moved to new position: x=292.13153076171875, y=570.321533203125, z=496.00872802734375

5.示例代码

5.1多无人机控制案例

配置文件:

1
2
3
4
5
6
7
8
9
10
11
12
13
[Game]
GameId="77777" #随便取
SubjectId=4 #对应科目几,体现在仿真启动后的标题“旋翼无人机自主避障科目”
Seconds=600 #好像没用
AirSimComPort=4443
AirSimCmdPort=4446

[Team]
TeamId="Team1"
IMVNum=1
CMSNum=1
QRTNum=10
QRBNum=1

启动:

python simple_test.py -n 10(加参数-n 10表示注册10辆无人机进行控制)

1
2
3
4
5
6
7
8
9
10
11
12
13
14
15
16
17
18
19
20
21
22
23
24
25
26
27
28
29
30
31
32
33
34
35
36
37
38
39
40
41
42
43
44
45
46
47
48
49
50
51
52
53
54
55
56
57
58
59
60
61
62
63
64
65
66
67
68
69
70
71
72
73
74
75
76
77
78
79
80
81
82
83
84
85
86
87
88
89
90
91
92
93
94
95
96
97
98
99
100
101
102
103
104
105
106
107
108
109
110
111
112
113
114
115
116
117
118
119
120
121
122
123
124
125
126
127
128
129
130
131
132
133
134
135
136
137
138
139
140
141
142
143
144
145
146
147
148
149
150
151
152
153
154
155
156
157
158
159
160
161
162
163
164
165
166
167
168
169
170
171
172
173
174
175
176
177
178
179
180
181
182
183
184
185
186
187
188
189
190
191
import argparse
import time
from swarmae.SwarmAEClient import SwarmAEClient
import math
from concurrent.futures import ThreadPoolExecutor

class SwarmaeClass:
def __init__(self):
self.ae_client = None
self.nodes = []
self.node_info = {} # 存储每个无人机的初始位置和高度
self.positions = [] # 存储每个无人机的当前位置

def create_client(self, ue_ip="127.0.0.1", ue_port=2000):
print("--Connecting to UE4 simulation:", ue_ip, ue_port)
self.ae_client = SwarmAEClient(ue_ip=ue_ip, ue_port=ue_port)
return self.ae_client

def create_node(self, id, max_retries=3):
for attempt in range(max_retries):
frame_timestamp = int(round(time.time() * 1000))
frame_timestamp, sw_node, sw_code = self.ae_client.register_node(
node_type="四旋翼", node_name="无人机" + str(id), node_no=id, frame_timestamp=frame_timestamp
)

if sw_code == 200:
node_name, node_no, team, node_type, _, _ = sw_node.get_node_info()
initial_location = sw_node.get_location()[:3]
print(f"--UAV {id} registered successfully: {node_name}, Type: {node_type}")
print(f"--Initial position: x={initial_location[0]:.2f}, y={initial_location[1]:.2f}, z={initial_location[2]:.2f}")
self.node_info[sw_node] = {
'flight_altitude': initial_location[2] + 1.0, # 设置飞行高度为起始z位置加1米
'ground_height': initial_location[2] + 0.1 # 设置地面高度为初始z位置
}
self.positions.append((sw_node, id, initial_location)) # 保存节点及其编号
self.nodes.append(sw_node)
return sw_code, sw_node
else:
print(f"--UAV {id} registration failed with code {sw_code}, attempt {attempt+1} of {max_retries}")
time.sleep(2) # 等待2秒后重试

print(f"UAV {id} registration failed after {max_retries} attempts.")
return sw_code, None

def move_to_position_xy(self, node, target_x, target_y, target_z):
node_index = self.nodes.index(node)
current_timestamp = int(round(time.time() * 1000))
node.control_kinetic_simply_global(x=target_x, y=target_y, z=target_z, v=3.0, frame_timestamp=current_timestamp)
while True:
current_location = node.get_location()[:3]
distance = math.sqrt((current_location[0] - target_x) ** 2 + (current_location[1] - target_y) ** 2)
self.update_position(node) # 实时更新位置
if distance <= 1.5:
print(f"[UAV {node_index + 1}] reached target position: x={target_x:.2f}, y={target_y:.2f}")
break
time.sleep(0.1)

def move_to_position_z(self, node, target_x, target_y, target_z):
node_index = self.nodes.index(node)
current_timestamp = int(round(time.time() * 1000))
node.control_kinetic_simply_global(x=target_x, y=target_y, z=target_z, v=3.0, frame_timestamp=current_timestamp)
while True:
current_location = node.get_location()[:3]
self.update_position(node) # 实时更新位置
if abs(current_location[2] - target_z) <= 0.2:
print(f"[UAV {node_index + 1}] reached target altitude: z={target_z:.2f}")
break
time.sleep(0.1)

def update_position(self, node):
"""更新并保存无人机的当前位置。"""
current_location = node.get_location()[:3]
node_index = self.nodes.index(node)
self.positions[node_index] = (node, node_index + 1, current_location)

def takeoff(self, node):
location = node.get_location()
x, y, z = location[:3]
target_z = self.node_info[node]['flight_altitude'] # 获取对应的飞行高度
self.move_to_position_z(node, x + 0.5, y + 0.5, target_z) # 垂直起飞需要在x,y上添加一点偏移,否则起飞过慢

def move_forward(self, node, distance):
location = node.get_location()
x, y, z = location[:3]
target_x = x + distance
self.move_to_position_xy(node, target_x, y, z)

def move_backward(self, node, distance):
location = node.get_location()
x, y, z = location[:3]
target_x = x - distance
self.move_to_position_xy(node, target_x, y, z)

def move_left(self, node, distance):
location = node.get_location()
x, y, z = location[:3]
target_y = y - distance
self.move_to_position_xy(node, x, target_y, z)

def move_right(self, node, distance):
location = node.get_location()
x, y, z = location[:3]
target_y = y + distance
self.move_to_position_xy(node, x, target_y, z)

def execute_flight_plan(self, flight_plan_funcs):
"""执行所有无人机的飞行计划。"""
if len(self.nodes) < len(flight_plan_funcs):
print("Not all nodes were successfully registered. Adjusting the flight plans.")
flight_plan_funcs = flight_plan_funcs[:len(self.nodes)]

with ThreadPoolExecutor() as executor:
futures = []
for node, flight_plan_func in zip(self.nodes, flight_plan_funcs):
futures.append(executor.submit(flight_plan_func, node))
for future in futures:
future.result() # 等待所有无人机完成其飞行计划

if __name__ == '__main__':
try:
parser = argparse.ArgumentParser()
parser.add_argument("-i", "--ip", default="127.0.0.1", help="指定服务器IP", type=str)
parser.add_argument("-p", "--port", default=2000, help="指定服务器Port", type=int)
parser.add_argument("-n", "--number", default=1, help="指定飞机数量", type=int)
args = parser.parse_args()

t1 = SwarmaeClass()
t1.create_client(args.ip, args.port)
for i in range(args.number):
t1.create_node(i+1)


#####################
# 定义飞行计划
# 前面的部分不需要改,要控制无人机的飞行,只需修改下面的部分即可
# flight_plan_n即第n个无人机的飞行计划函数
# t1.takeoff(node) # 起飞
# t1.move_forward(node, distance) # 向前移动distance米
# t1.move_backward(node, distance) # 向后移动distance米
# t1.move_left(node, distance) # 向左移动distance米
# t1.move_right(node, distance) # 向右移动distance米
#####################

# 定义不同无人机的飞行航线
def flight_plan_1(node):
t1.takeoff(node)
t1.move_forward(node, 10.0) # 向前移动10米
t1.move_left(node, 5.0) # 向左移动5米
t1.move_forward(node, 10.0) # 向前移动10米
t1.move_right(node, 5.0) # 向左移动5米

def flight_plan_2(node):
t1.takeoff(node)
t1.move_left(node, 10.0)
t1.move_forward(node, 15.0)

def flight_plan_3(node):
t1.takeoff(node)
t1.move_forward(node, 10.0)
t1.move_left(node, 25.0)

def flight_plan_4(node):
t1.takeoff(node)
t1.move_forward(node, 15.0)
t1.move_right(node, 5.0)

def flight_plan_5(node):
t1.takeoff(node)
t1.move_forward(node, 30.0)
t1.move_left(node, 15.0)

# 飞行计划列表,每个元素对应一个无人机的飞行路线
flight_plan_funcs = [
flight_plan_1,
flight_plan_2,
flight_plan_3,
flight_plan_4,
flight_plan_5
]

t1.execute_flight_plan(flight_plan_funcs)

# 打印所有无人机的最终位置
for node, index, position in t1.positions:
print(f"[UAV {index}] Final position: x={position[0]:.2f}, y={position[1]:.2f}, z={position[2]:.2f}")

except KeyboardInterrupt:
print("\n--Simulation interrupted by user.")
except Exception as e:
print(f"\n--An error occurred: {e}")

注:说明在代码中,将无人机向前后左右飞行封装为一个函数,多线程控制多辆无人机,判断无人机是否到达指定目标点才给下一个目标点进行控制,根据上面的例程进行修改,修改内容为无人机的飞行航线,其余不需要修改

flight_plan_funcs列表表示无人机控制函数列表,flight_plan_1表示第1个无人机的具体飞行控制

5.2多小车控制案例

使用:python simple_test_car.py

1
2
3
4
5
6
7
8
9
10
11
12
13
14
15
16
17
18
19
20
21
22
23
24
25
26
27
28
29
30
31
32
33
34
35
36
37
38
39
40
41
42
43
44
45
46
47
48
49
50
51
52
53
54
55
56
57
58
59
60
61
62
63
64
65
66
67
68
69
70
71
72
73
74
75
76
77
78
79
80
81
82
83
84
85
86
87
88
89
90
91
92
93
94
95
96
97
98
99
100
101
102
103
104
105
106
107
108
109
110
111
112
113
114
115
116
117
118
119
120
121
122
123
124
125
126
127
128
129
130
131
132
133
134
135
136
137
138
139
140
141
142
143
144
145
146
147
148
149
150
import argparse
import time
from swarmae.SwarmAEClient import SwarmAEClient
from concurrent.futures import ThreadPoolExecutor
import math

class SwarmaeClass:
def __init__(self):
self.ae_client = None
self.vehicles = []
self.vehicle_info = {} # 存储每辆车的初始位置和其他信息
self.positions = [] # 存储每辆车的当前位置

def create_client(self, ue_ip="127.0.0.1", ue_port=2000):
print("--Connecting to UE4 simulation:", ue_ip, ue_port)
self.ae_client = SwarmAEClient(ue_ip=ue_ip, ue_port=ue_port)
return self.ae_client

def create_vehicle(self, id, max_retries=3):
for attempt in range(max_retries):
frame_timestamp = int(round(time.time() * 1000))
frame_timestamp, sw_vehicle, sw_code = self.ae_client.register_node(
node_type="四轮车", node_name="无人车" + str(id), node_no=id, frame_timestamp=frame_timestamp
)

if sw_code == 200:
vehicle_name, vehicle_no, team, vehicle_type, _, _ = sw_vehicle.get_node_info()
initial_location = sw_vehicle.get_location()[:3]
print(f"--Vehicle {id} registered successfully: {vehicle_name}, Type: {vehicle_type}")
print(f"--Initial position: x={initial_location[0]:.2f}, y={initial_location[1]:.2f}, z={initial_location[2]:.2f}")
self.vehicle_info[sw_vehicle] = {
'initial_location': initial_location
}
self.positions.append((sw_vehicle, id, initial_location)) # 保存车辆及其ID
self.vehicles.append(sw_vehicle)
return sw_code, sw_vehicle
else:
print(f"--Vehicle {id} registration failed with code {sw_code}, attempt {attempt+1} of {max_retries}")
time.sleep(2) # 等待2秒后重试

print(f"Vehicle {id} registration failed after {max_retries} attempts.")
return sw_code, None

def move_vehicle(self, vehicle, throttle, steer=0.0):
"""控制车辆的移动和转向"""
vehicle.apply_control(throttle, steer, 0.0, 0, 1)
# vehicle.set_vehicle_steer(steer) # 设置车辆方向盘转角
# vehicle.control_vehicle(throttle=throttle) # 控制车辆油门
print(f"【Vehicle {self.vehicles.index(vehicle) + 1}】 is moving with throttle={throttle}, steer={steer}")

def brake_vehicle(self, vehicle):
"""控制车辆刹车并确保车辆停止"""
vehicle.apply_control(0.0, 0.0, 0.0, 1, 0)
# while True:
# # 获取车辆当前速度信息
# velocity_x, velocity_y, velocity_z, velocity, _, _, _, _, _, p, q, r, _ = vehicle.get_velocity()
# # speed = math.sqrt(velocity_x**2 + velocity_y**2 + velocity_z**2) # 计算总速度
# # print(velocity_x, velocity_y)

# if velocity_x <= 0.0 or velocity_y <= 0.0: # 如果速度接近零,则停止车辆
# vehicle.apply_control(0.0, 0.0, 0.0, 1, 0)
# # vehicle.control_vehicle(throttle=0.0)
# print(f"【Vehicle {self.vehicles.index(vehicle) + 1}】 has stopped.")
# break
# else:
# vehicle.control_vehicle(throttle=-1.0) # 否则继续减速
# time.sleep(0.1) # 等待0.1秒再次检查速度

def update_position(self, vehicle):
"""更新并保存车辆的当前位置。"""
current_location = vehicle.get_location()[:3]
vehicle_index = self.vehicles.index(vehicle)
self.positions[vehicle_index] = (vehicle, vehicle_index + 1, current_location)

def execute_vehicle_movement(self, movement_func, vehicle):
"""执行单个车辆的移动计划。"""
if movement_func:
movement_func(vehicle) # 执行传入的移动计划函数
else:
print(f"No movement plan provided for vehicle {vehicle}. Skipping control.")

def execute_movement_plans(self, movement_plan_funcs):
"""执行所有车辆的移动计划。"""
if len(self.vehicles) < len(movement_plan_funcs):
print("Not all vehicles were successfully registered. Adjusting the movement plans.")
movement_plan_funcs = movement_plan_funcs[:len(self.vehicles)]

with ThreadPoolExecutor() as executor:
futures = []
for vehicle, movement_plan_func in zip(self.vehicles, movement_plan_funcs):
futures.append(executor.submit(self.execute_vehicle_movement, movement_plan_func, vehicle))
for future in futures:
future.result() # 等待所有车辆完成其移动计划

if __name__ == '__main__':
try:
parser = argparse.ArgumentParser()
parser.add_argument("-i", "--ip", default="127.0.0.1", help="指定服务器IP", type=str)
parser.add_argument("-p", "--port", default=2000, help="指定服务器Port", type=int)
parser.add_argument("-n", "--number", default=2, help="指定车辆数量", type=int)
args = parser.parse_args()

t1 = SwarmaeClass()
t1.create_client(args.ip, args.port)
for i in range(args.number):
t1.create_vehicle(i+1)


#####################
# 定义移动计划
# 前面的部分不需要改,要控制车辆的移动,只需修改下面的部分即可
# movement_plan_n即第n个车辆的移动计划函数
# t1.move_vehicle(vehicle, throttle, steer) # 移动
#####################

def movement_plan_1(vehicle):
t1.move_vehicle(vehicle, throttle=1.0) # 向前移动
time.sleep(5) # 移动5秒
t1.brake_vehicle(vehicle) # 刹车并停止
t1.move_vehicle(vehicle, throttle=0.0, steer=-0.5) # 向左转
time.sleep(5)
t1.brake_vehicle(vehicle) # 刹车并停止
t1.move_vehicle(vehicle, throttle=1.0)
time.sleep(4)
t1.brake_vehicle(vehicle) # 刹车并停止

def movement_plan_2(vehicle):
t1.move_vehicle(vehicle, throttle=0.1, steer=-1.0) # 向前向左移动
time.sleep(5)
t1.move_vehicle(vehicle, throttle=1.0, steer=0) # 向前向左移动
time.sleep(5)
t1.brake_vehicle(vehicle) # 刹车并停止

# 移动计划列表,每个元素对应一个车辆的移动路线
movement_plan_funcs = [
movement_plan_1,
movement_plan_2,
# 添加更多车辆的移动计划
]

t1.execute_movement_plans(movement_plan_funcs)

# 打印所有车辆的最终位置
for vehicle, index, position in t1.positions:
print(f"【Vehicle {index}】 Final position: x={position[0]:.2f}, y={position[1]:.2f}, z={position[2]:.2f}")

except KeyboardInterrupt:
print("\n--Simulation interrupted by user.")
except Exception as e:
print(f"\n--An error occurred: {e}")

5.3地图信息读取

使用:python get_map_info.py -s 1(-s 1表示第一个科目的地图信息,需要先打开仿真地图才能获取信息)

在具体代码中调用:

  • 定义全局变量map_info = {},方便在其他函数中调用

  • 复制对应科目的函数,如def get_subject_one_info(world)

  • 在main函数中添加map_info = get_subject_one_info(world)

  • 调用地图信息的方式:

    • map_info['BP_Bridge']['local'][0][0],表示科目一中第一条桥的x

    • map_info['BP_Bridge']['local'][0][1],表示科目一中第一条桥的y

    • map_info['BP_Bridge']['local'][0],表示科目一中第一条桥的x,y,z

    • map_info['BP_Bridge']['local'][1],表示科目一中第二条桥的x,y,z

    • map_info['SM_SpeedBump']['local'][0],表示科目一中第一条区域线的x,y,z

如果是科目五中还有门框的旋转信息,则为map_info['SM_DoorFrame']['rotation'],表示科目五中第一条外门框的pitch, yaw, roll

  1. 科目一
静态资源名名称前缀坐标信息示例(SDK方式)坐标信息示例(fbx方式)备注
BP_Bridge第一段:(x=-515.309021, y=447.157715)x: -511.30445003032685, y: 447.1577346801758, z: 485.1984389305115整座桥由12部分组成
区域线SM_SpeedBump第一条:x = -1072.7。第二条:x = -1062.7x: -1072.72, y: 439.79998779296875, z: 486.4460653877258一共五条
  1. 科目二
静态资源名名称前缀坐标信息示例(SDK方式)坐标信息示例(fbx方式)备注
火力掩护区域SM_Wall_Singlex=1286.280029, y=423.690002, z=486.449982x: 1286.2800677490218, y: 423.69001159667823, z: 487.70000022888183获取到遮掩区域的两个顶点信息
路障SM_Obstaclex=1761.797974, y=450.703613, z=487.442017x: 1761.797890625, y: 450.7036328125, z: 487.44203125路障有四个
  1. 科目四
静态资源名名称前缀坐标信息示例(SDK方式)坐标信息示例(fbx方式)备注
航路点信息Waypoint第一个:x=504.899994, y=89.610001x: 504.89998046875, y: 89.6099609375, z: 490.92625一共两个航路点。
  1. 科目五
静态资源名名称前缀坐标信息示例(SDK方式)坐标信息示例(fbx方式)备注
外门框SM_DoorFrame第一个:(x=780.000000, y=937.599976, z=490.551331)门的转向:Rotation(pitch=0.000000, yaw=0.000000, roll=0.000000)一共两个门。 fbx方式读取缺少一个门框信息,可直接查询内门框信息实现穿越。
内门框(需要穿越的门框)BP_DoorInst这两个的 X,Y相同,Z 不同,绝对值|Z1 - Z2|是门的高度x: 780.0, y: 937.6, z: 502.2一共两个门。
1
2
3
4
5
6
7
8
9
10
11
12
13
14
15
16
17
18
19
20
21
22
23
24
25
26
27
28
29
30
31
32
33
34
35
36
37
38
39
40
41
42
43
44
45
46
47
48
49
50
51
52
53
54
55
56
57
58
59
60
61
62
63
64
65
66
67
68
69
70
71
72
73
74
75
76
77
78
79
80
81
82
83
84
85
86
87
88
89
90
91
92
93
94
95
96
97
98
99
100
101
102
103
104
105
106
107
108
109
110
111
112
113
114
115
116
117
118
119
120
121
122
123
124
125
126
127
128
129
130
131
132
133
134
135
136
137
138
139
140
141
142
143
144
145
146
147
148
149
150
151
152
153
154
155
156
157
158
159
160
161
162
163
164
165
166
167
168
169
170
171
172
173
#!/usr/bin/env python
import argparse
import time

map_info = {}

def get_subject_one_info(world):
subject_one_info = {
'Bridges': {
'location': []
},
'SpeedBumps': {
'location': []
}
}

# 获取桥的坐标信息
BP_Bridges = list(filter(lambda x: x.name.startswith('BP_Bridge'), world.get_environment_objects()))
for bridge in BP_Bridges:
if hasattr(bridge, 'transform') and hasattr(bridge.transform, 'location'):
subject_one_info['Bridges']['location'].append([
bridge.transform.location.x,
bridge.transform.location.y,
bridge.transform.location.z
])

# 获取区域线的坐标信息
SM_SpeedBumps = list(filter(lambda x: x.name.startswith('SM_SpeedBump'), world.get_environment_objects()))
for speed_bump in SM_SpeedBumps:
if hasattr(speed_bump, 'transform') and hasattr(speed_bump.transform, 'location'):
subject_one_info['SpeedBumps']['location'].append([
speed_bump.transform.location.x,
speed_bump.transform.location.y,
speed_bump.transform.location.z
])

return subject_one_info

def get_subject_two_info(world):
subject_two_info = {
'FireCoverArea': {
'location': []
},
'Obstacles': {
'location': []
}
}

# 获取火力掩护区域的坐标信息
SM_Walls = list(filter(lambda x: x.name.startswith('SM_Wall_Single'), world.get_environment_objects()))
for wall in SM_Walls:
if hasattr(wall, 'transform') and hasattr(wall.transform, 'location'):
subject_two_info['FireCoverArea']['location'].append([
wall.transform.location.x,
wall.transform.location.y,
wall.transform.location.z
])

# 获取路障的坐标信息
SM_Obstacles = list(filter(lambda x: x.name.startswith('SM_Obstacle'), world.get_environment_objects()))
for obstacle in SM_Obstacles:
if hasattr(obstacle, 'transform') and hasattr(obstacle.transform, 'location'):
subject_two_info['Obstacles']['location'].append([
obstacle.transform.location.x,
obstacle.transform.location.y,
obstacle.transform.location.z
])

return subject_two_info

def get_subject_four_info(world):
subject_four_info = {
'Waypoints': {
'location': []
}
}

# 获取航路点的坐标信息
Waypoints = list(filter(lambda x: x.name.startswith('Waypoint'), world.get_environment_objects()))
for waypoint in Waypoints:
if hasattr(waypoint, 'transform') and hasattr(waypoint.transform, 'location'):
subject_four_info['Waypoints']['location'].append([
waypoint.transform.location.x,
waypoint.transform.location.y,
waypoint.transform.location.z
])

return subject_four_info

def get_subject_five_info(world):
subject_five_info = {
'OuterDoorFrames': {
'location': [],
'rotation': []
},
'InnerDoorFrames': {
'location': [],
'rotation': []
}
}

# 获取外门框的位置信息和角度信息
SM_DoorFrames = list(filter(lambda x: x.name.startswith('SM_DoorFrame'), world.get_environment_objects()))
for door_frame in SM_DoorFrames:
if hasattr(door_frame, 'transform') and hasattr(door_frame.transform, 'location') and hasattr(door_frame.transform, 'rotation'):
subject_five_info['OuterDoorFrames']['location'].append([
door_frame.transform.location.x,
door_frame.transform.location.y,
door_frame.transform.location.z
])
subject_five_info['OuterDoorFrames']['rotation'].append([
door_frame.transform.rotation.pitch,
door_frame.transform.rotation.yaw,
door_frame.transform.rotation.roll
])

# 获取内门框的位置信息和角度信息
BP_DoorInsts = list(filter(lambda x: x.name.startswith('BP_DoorInst'), world.get_environment_objects()))
for door_inst in BP_DoorInsts:
if hasattr(door_inst, 'transform') and hasattr(door_inst.transform, 'location') and hasattr(door_inst.transform, 'rotation'):
subject_five_info['InnerDoorFrames']['location'].append([
door_inst.transform.location.x,
door_inst.transform.location.y,
door_inst.transform.location.z
])
subject_five_info['InnerDoorFrames']['rotation'].append([
door_inst.transform.rotation.pitch,
door_inst.transform.rotation.yaw,
door_inst.transform.rotation.roll
])

return subject_five_info

def main():
argparser = argparse.ArgumentParser(description=__doc__)
argparser.add_argument('-i', '--address', default='127.0.0.1')
argparser.add_argument('-p', '--port',type=int,default=2000)
argparser.add_argument('-n', '--number',type=int,default=1)
argparser.add_argument('-s', '--subject',type=int,default=1)
args = argparser.parse_args()

ue_ip = args.address.strip()
ue_port = args.port
num = args.number
try:
# 1. 首先引入sdk
from swarmae.SwarmAEClient import SwarmAEClient
from swarmae.SwarmAEWorld import SwarmAEWorld
# 2. 连接UE
client = SwarmAEClient(ue_ip=ue_ip, ue_port=ue_port)
# sdk读取仿真世界,需要 1.0.1 sdk 才支持
timestamp, world, code = client.get_world()

# 获取科目的地图信息
if args.subject == 1:
map_info = get_subject_one_info(world)
elif args.subject == 2:
map_info = get_subject_two_info(world)
elif args.subject == 4:
map_info = get_subject_four_info(world)
elif args.subject == 5:
map_info = get_subject_five_info(world)

print(map_info)

except KeyboardInterrupt:
pass

if __name__ == '__main__':
try:
main()
except KeyboardInterrupt:
pass